
Sweet Art
Inspired by her favorite artists, our resident food stylist, Kara, made the leap from canvas to cake. With these creative techniques, you too can add an artsy edge to your next dessert.
- CategoryEat & Drink
- Produced, styled & photographed byKara Mickelson
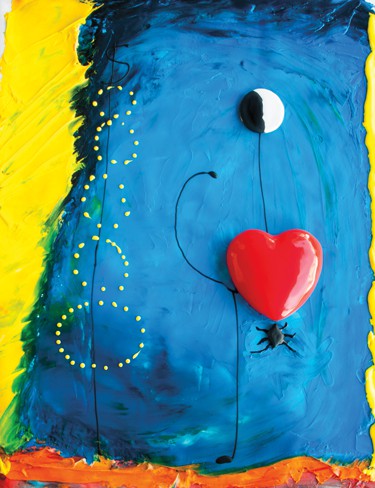
Heart-Shaped Cake with Red Mirror Glaze
Colored frosting on canvas with iced sugar cookies and royal icing
Inspiration: Joan Miró, Ballerina II, Abstract & Surrealism
Technique: Mirror Glaze
How To Do It:
Savour Chocolate & Patisserie School on YouTube has great video tutorials. Pastry chef Kirsten Tibballs’ recipe for marble glaze is a great resource. Just eliminate the other colors and only use red for the heart cake.
Order hard-to-find items online such as sheet gelatin, neutral glaze (if using), high-quality coverture white chocolate, glucose and flexible silicon mold. Allow extra time for delivery of items.
 Success Tips:
- Be patient. When making the glaze, be mindful of temperatures. Gelatin’s setting power will diminish if overheated (above 140º). Use the type of gelatin suggested in the recipe, as it is difficult to substitute from sheet to powder or between grades (bronze–platinum). Each type has a different bloom strength or setting power.
- Plan to have extra glaze to cover the whole, completely smooth cake. The mixed glaze should also be free
from bubbles. - The glaze temp should be between 95º and 98º. Some recipe temps may vary. Hot glaze will pour too thin, and cooler glaze will pour too thick—not creating the perfect mirror glaze.
- A mousse-base cake or cake covered with marzipan or fondant works best for shaped cakes. A buttercream-frosted cake is not recommended unless it is covered with marzipan or fondant.
- Freeze cake before glazing.
- Set up pouring station. Don’t use a grate or cooling rack if you don’t have any support under your cake. It will just stick and become difficult to remove. It is also harder to get a spatula under the cake once glazed. A smooth-topped container that allows the glaze to flow over the cake but also remains stable while pouring is preferred. Pour glaze until cake is covered.
- Use a paring knife to trim off drips at the bottom of
the cake. - Carefully lift cake on spatula and place in refrigerator for glaze to set. Cake can be stored overnight or frozen for several weeks in an airtight container.
- Glaze can be made in advance and reheated in the microwave. Don’t overheat and follow temp guidelines above.
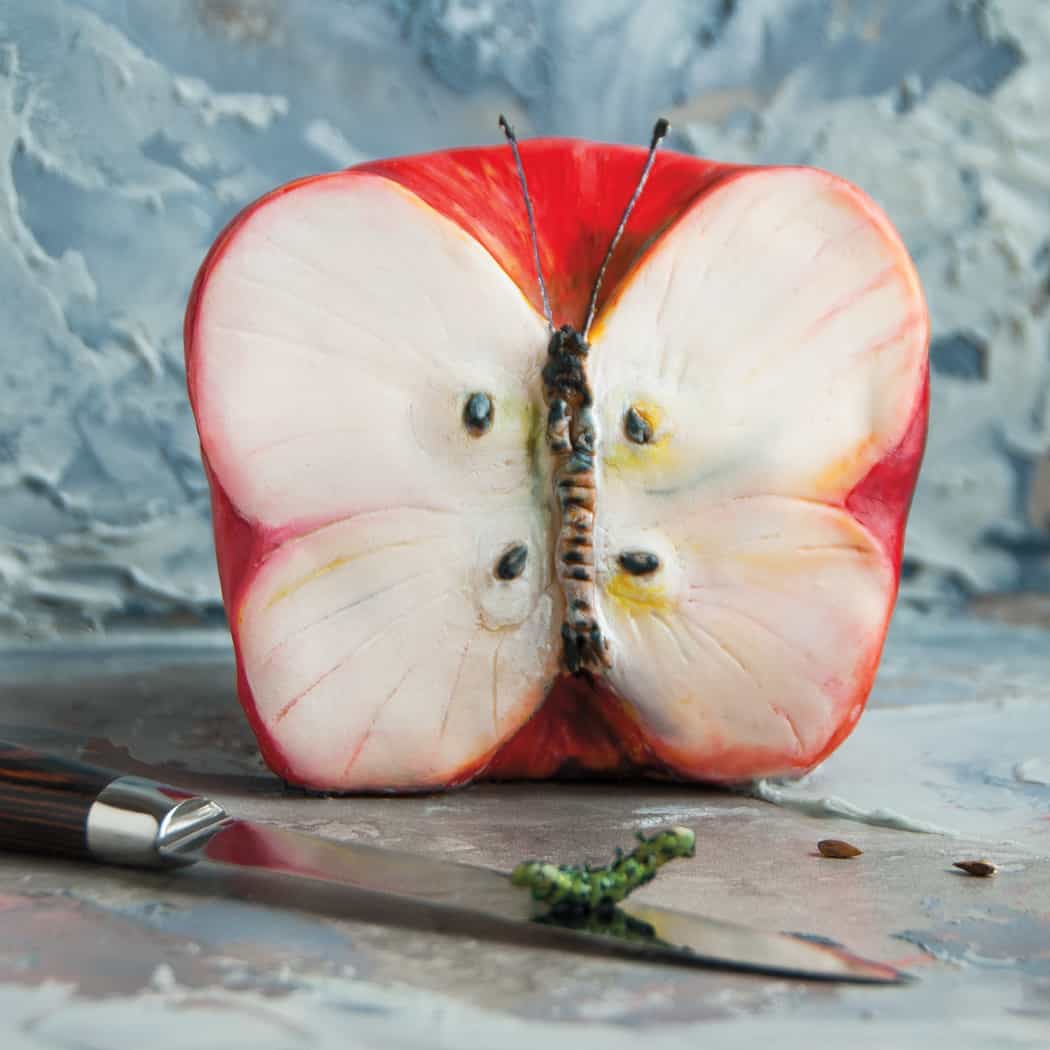
Sculptured Butterfly Apple Cake
Fondant cake and insects on a base display of “painted” tiles
Inspiration: Vladimir Kush, Surrealist
Technique: Custom sculptured and painted cake with accents
How To Do It:
To recreate an artist’s work, source any accent props that will help create the visual story. For this project, adding the knife and “painting” two surface tiles with colored frosting helped set the scene.
 Make two copies of the cake art—one for reference and one to create a reference pattern. Use the photocopy cutouts as a guide or use a Kopykake projector that will display the image onto your cake. The printout should be the same size as the cake you want to create. This will help recreate the correct perspective.
Create cake layers and secure pieces together with buttercream in order to get the right size base to carve. Chill to set buttercream.
After refrigerating, use a paring knife to hand-carve the butterfly apple. Toothpicks can help set the shape before carving.
Use your fingers to help form the cake shape. Pound cake will be easy to mold with light pressure. Crumb coat the cake with buttercream and chill to set.
Add colored fondant and food coloring gels as needed to get the correct color for the apple exterior.
Roll out fondant or marzipan to ¼ inch or slightly less for the front of the apple. Marzipan is a little sticky and harder to work with than fondant, but it has a nice almond flavor. Whatever covering you use or mix of product (fondant/marzipan) should be thin and pliable enough to drape over the cake but thick enough not to tear.
Mold and smooth round shapes with clean hands and trim excess product as needed with culinary scissors or a paring knife. Use a cake smoother to work out any bubbles or imperfections.
Add any accent lines for the butterfly wings with an edible sketch pen from Sweet Sugarbelle.
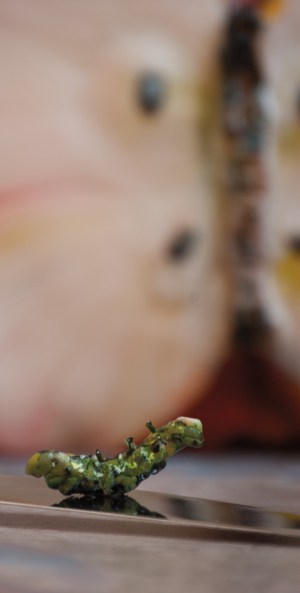
Use fondant to create the butterfly body and insects and floral cake stems for the butterfly antennas and the feelers on the caterpillar and fly legs. Color stems with black edible ink before using. Add edible marker and cake paint to add dimension to fondant pieces and create a painted look. Secure accent pieces with edible glue, royal icing or frosting.
Success Tips:
- Use a cake with a tender but dense crumb, such as pound cake. It will be easier to manage and shape.
- Fondant cakes can be refrigerated, although some fondant is temperamental and will get sticky or sweat once removed. Just let the condensation dry a bit before handling.
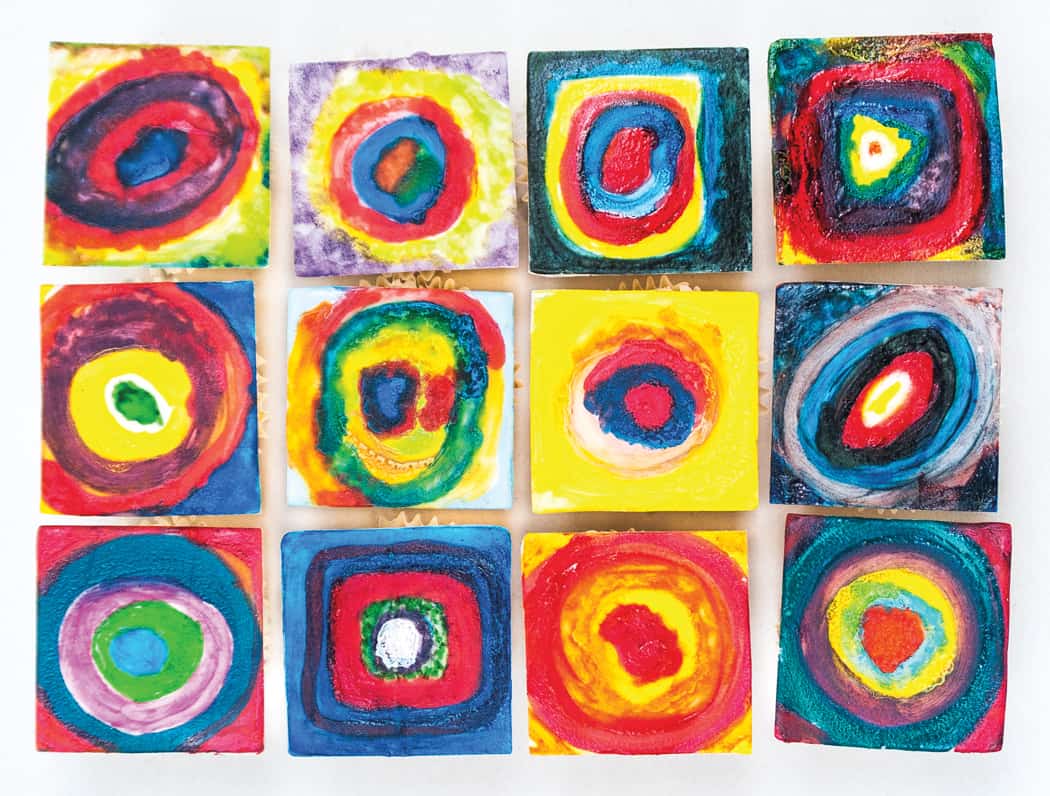
Edible Abstracts
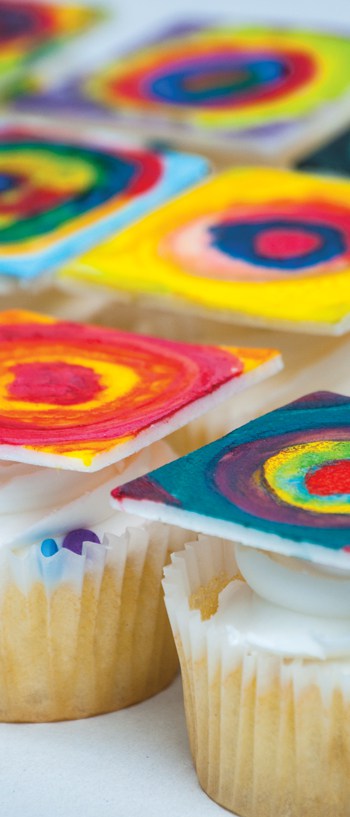
Mini cupcakes with colorful fondant toppers
Inspiration: Wassily Kandinsky, Color Study, Squares with Concentric Circles, Abstract
Technique: Edible cake paint and markers on rolled white fondant
How To Do It:
Outline design with an edible marker. If creating an intricate design, consider using a Kopykake projector to project the design onto your cake or accent piece.
Paint in stages to avoid color bleed and use a combination of markers and dust mixed with vodka or lemon extract to create difficult colors.
Violets, greys, reds and specific shades are challenging to create. Color mixing does not consistently yield great results. It can take a lot of time trying to match the desired color.
It’s preferred to use cake paint in the color you desire instead of trying to mix shades, although sometimes layering edible ink and cake paints will work. Be sure to test your colors while wet and dry.
Success Tips:
- Practice, practice, practice before committing to painting directly on a covered cake. Colors are not always vibrant or can look different when dry or unlike the shade you were expecting.
- Accent fondant pieces are the easiest way to get comfortable with painting on fondant. They can be attached with royal icing, frosting or edible glue.
Add bright white gel to the fondant to create a nice bright white base. Knead for several minutes and then roll out the fondant and cut to desired size and thickness. If the fondant is sticky, dust your hands with some powdered sugar. Don’t use too much or the fondant will lose elasticity and become dull and difficult to work with. Keep rolling out the fondant until you have enough for your cupcakes and extra for practice. Let fondant dry overnight unrefrigerated. A food dehydrator can help speed up the process of drying.
- Food coloring can be used with a small amount of alcohol or lemon extract to thin and set the color; however edible cake paint and markers will provide the best color match and are easier to use for deep vibrant colors.
- Have absorbent, high-quality paper towels and cotton swabs on hand to remove access color and touch up mistakes. Containers of water will clean brushes between color application.
- If using edible markers, make sure the fondant is firm so the marker won’t create indentations. Some markers are sharper than others. Buy extra markers in the colors you want, as they dry out fast.
- Let your painted pieces dry and top your frosted cupcake or secure them to a finished cake. Remove any hard pieces before consuming.

Southbay ‘s Annual Spring Style Guide Has the Latest Fashion Trends, Jewelry, Home Goods and Gifts!
Shop local and support our amazing businesses.